
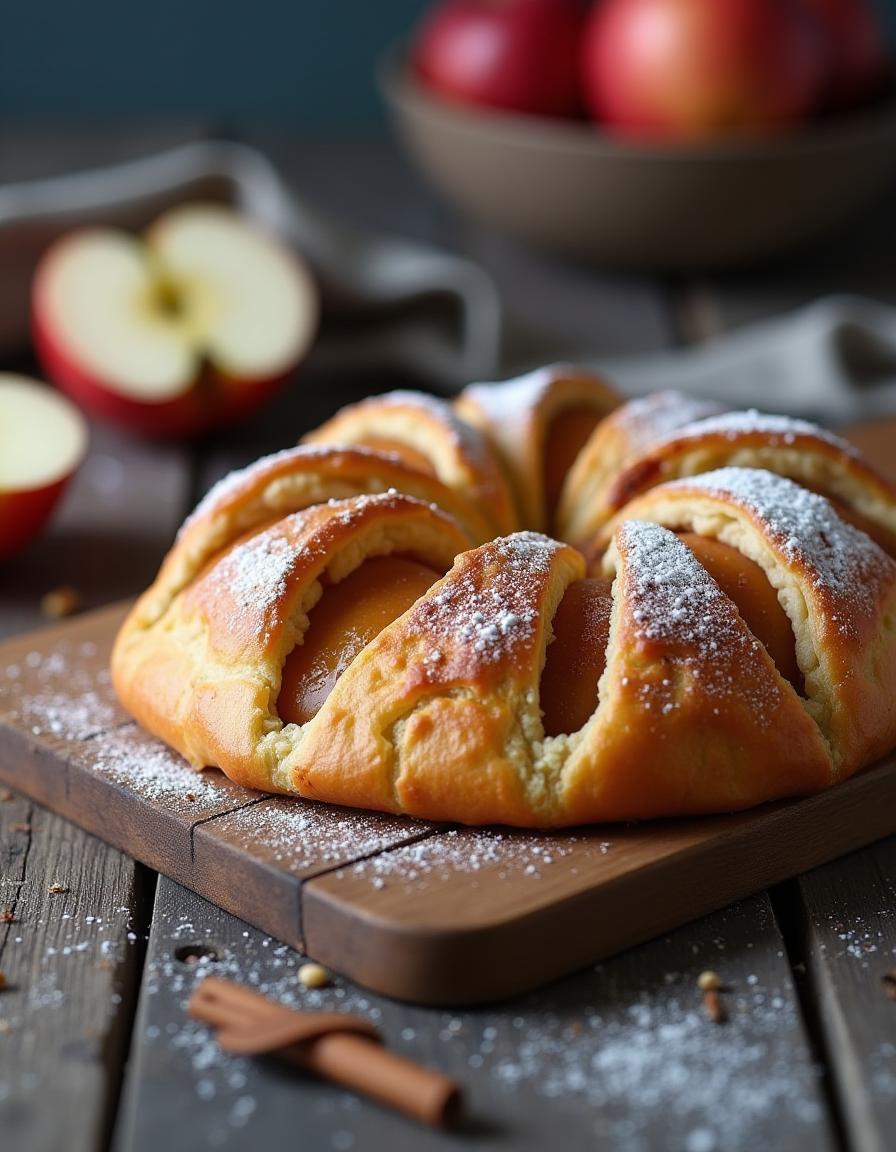
Who doesn’t love the smell of warm, buttery pastry wafting through the kitchen? Add the sweet, tangy aroma of baked apples, and you’ve got yourself a dessert that’s pure magic. Whether you’re a seasoned baker or a newbie in the kitchen, this apple puff pastry recipe is your ticket to impressing friends, family, or even just treating yourself to something special. 🍎✨
Table of Contents
Why Apple Puff Pastry is a Dessert Favorite
Let’s be real—apple puff pastry is the dessert equivalent of a cozy blanket on a chilly day. It’s warm, comforting, and just the right amount of indulgent. But what makes it so special?
For starters, it’s the perfect balance of textures. The flaky, buttery layers of puff pastry contrast beautifully with the soft, caramelized apples. Add a sprinkle of cinnamon or a drizzle of caramel, and you’ve got a dessert that’s impossible to resist. Plus, it’s versatile! You can serve it as a fancy dinner party dessert or enjoy it as a quick snack with your afternoon coffee. ☕
The History of Puff Pastry and Its Versatility
Puff pastry has been around for centuries, and its origins are as rich as its flavor. Legend has it that the French chef Claude Gelée invented it in the 17th century. Whether that’s true or not, one thing’s for sure: puff pastry is a culinary masterpiece.
What makes it so versatile? It’s like the Swiss Army knife of baking. You can use it for sweet or savory dishes—think apple turnovers, cheese straws, or even beef Wellington. The layers of dough and butter create a light, airy texture that’s hard to beat. And when paired with apples? Pure heaven. 🥐🍏
Why Apples and Puff Pastry Are a Match Made in Heaven
Apples and puff pastry are like peanut butter and jelly—they just belong together. Apples bring a natural sweetness and a slight tartness that cuts through the richness of the pastry. Plus, they hold their shape well when baked, so you get those beautiful, tender slices in every bite.
But not all apples are created equal. Some are better for baking than others, and we’ll get into that in a bit. For now, just know that when you combine the right apples with flaky puff pastry, you’re in for a treat. 🍎🥮
Essential Ingredients for an Apple Puff Pastry Recipe
Before we dive into the step-by-step process, let’s talk ingredients. The beauty of this recipe lies in its simplicity, but using high-quality ingredients can take it from good to great. Here’s what you’ll need:
Choosing the Right Apples for Your Recipe
Not all apples are created equal, especially when it comes to baking. You want an apple that’s firm enough to hold its shape but sweet enough to balance the pastry. Here are a few favorites:
- Granny Smith: Tart and firm, these apples are a classic choice for baking.
- Honeycrisp: Sweet and juicy, they add a lovely flavor without being too soft.
- Braeburn: A great middle ground—sweet, tart, and holds up well in the oven.
For more information on apple varieties suitable for baking, refer to the United States Department of Agriculture’s guide on apple varieties.
The Importance of Quality Puff Pastry
Let’s be honest—making puff pastry from scratch is a labor of love. It’s time-consuming and requires precision. But here’s the good news: store-bought puff pastry works just as well! Look for all-butter puff pastry for the best flavor and texture. It’s a game-changer. 🧈
Additional Ingredients to Elevate Your Recipe
While apples and puff pastry are the stars of the show, a few extra ingredients can take your dessert to the next level:
- Cinnamon: A classic pairing with apples, it adds warmth and depth.
- Brown Sugar: For a deeper, caramel-like sweetness.
- Lemon Juice: A splash helps balance the sweetness and keeps the apples from browning.
- Vanilla Extract: Adds a subtle, aromatic flavor.
For more ingredient tips, head over to our Cook’s Compass section to explore the nuances of ingredients.
Step-by-Step Guide to Making Apple Puff Pastry
Now that we’ve covered the basics, let’s get into the fun part—making the apple puff pastry! Follow these steps, and you’ll have a dessert that’s as beautiful as it is delicious.
Preparing the Apples: Tips for Perfect Slices
Start by peeling, coring, and slicing your apples. Aim for thin, even slices—about 1/4 inch thick. This ensures they cook evenly and fit nicely into the pastry. Toss the slices with a bit of lemon juice, cinnamon, and brown sugar. Let them sit for 10-15 minutes to release some of their juices. This step is crucial for preventing a soggy pastry later on. 🍋
How to Roll and Cut Puff Pastry Like a Pro
If you’re using store-bought puff pastry, let it thaw according to the package instructions. Once it’s pliable, roll it out on a lightly floured surface. Aim for a rectangle about 1/8 inch thick. Use a sharp knife or a pizza cutter to divide the pastry into squares or rectangles, depending on the size of your pastries.
Fun Fact: Did you know that puff pastry can rise up to 8 times its original thickness when baked? That’s why it’s so light and flaky!
Assembling Your Apple Puff Pastry
Place a few apple slices in the center of each pastry square. Be careful not to overfill—you want enough room to fold the pastry over. Brush the edges with a bit of beaten egg (this acts as glue) and fold the pastry over the apples. Use a fork to crimp the edges, sealing everything tightly.
Baking Tips for a Golden, Flaky Finish
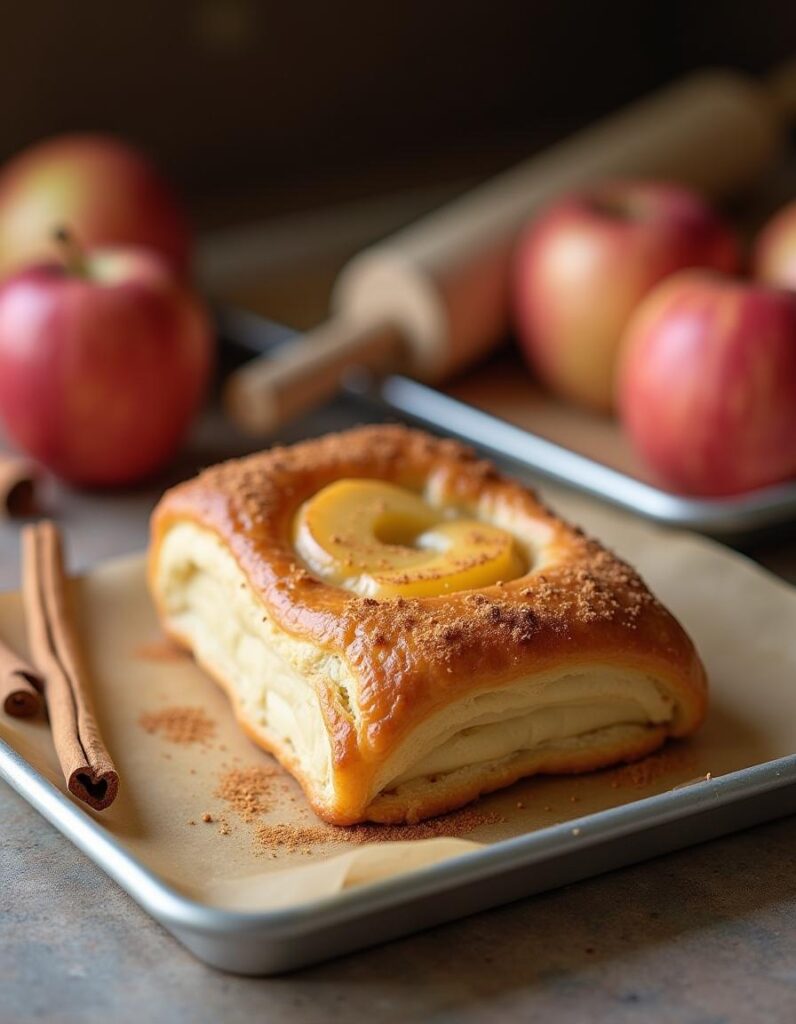
Preheat your oven to 400°F (200°C). Place the assembled pastries on a baking sheet lined with parchment paper. Brush the tops with more beaten egg for that golden, glossy finish. Bake for 20-25 minutes, or until the pastry is puffed and golden brown. Let them cool for a few minutes before serving. 🥮
That’s it for Part 1! In the next section, we’ll dive into common problems and solutions, creative variations, and serving suggestions. Stay tuned! 🍎✨
Block Quote:
“Baking is both an art and a science. With the right ingredients and a little patience, you can create something truly magical.” – Unknown
Common Problems and Solutions When Making Apple Puff Pastry
Even the most experienced bakers run into issues sometimes. Don’t worry—we’ve got solutions for the most common problems you might face when making apple puff pastry. Let’s troubleshoot like pros! 🛠️
Why Is My Puff Pastry Not Rising?
Ah, the heartbreak of flat puff pastry. If your pastry isn’t rising, it could be due to a few reasons:
- Overworking the Dough: Puff pastry needs to stay cold to create those flaky layers. If you handle it too much, the butter melts, and the layers stick together.
- Oven Temperature: If your oven isn’t hot enough, the pastry won’t puff up properly. Always preheat your oven and use an oven thermometer to ensure accuracy.
- Old Pastry: If you’re using store-bought puff pastry, check the expiration date. Old pastry won’t rise as well.
Pro Tip: Chill your assembled pastries in the fridge for 10-15 minutes before baking. This helps the butter firm up, ensuring maximum puffiness.
How to Prevent Soggy Apple Puff Pastry
Soggy pastry is a no-go. Here’s how to keep it crisp and flaky:
- Drain the Apples: After tossing the apple slices with sugar and spices, let them sit for a bit. Then, drain any excess liquid before assembling.
- Use a Baking Sheet with Holes: If you have a perforated baking sheet, use it! It allows air to circulate, preventing sogginess.
- Don’t Overfill: Too many apples can release too much juice during baking. Stick to a single layer of slices.
Fixing Overcooked or Undercooked Pastry
Timing is everything when it comes to baking. If your pastry is overcooked, it might be dry and tough. If it’s undercooked, it’ll be doughy and unappetizing. Here’s how to avoid both:
- Set a Timer: Bake for 20-25 minutes, but start checking at the 18-minute mark. Every oven is different!
- Use the Right Temperature: Too high, and the pastry burns before the apples cook. Too low, and the pastry won’t puff up. Stick to 400°F (200°C).
Creative Variations of the Classic Apple Puff Pastry Recipe
Once you’ve mastered the basics, it’s time to get creative! Here are some fun twists on the classic recipe. 🎨
Adding Spices for a Warm, Autumnal Flavor
Cinnamon is a classic, but why stop there? Experiment with other spices like:
- Nutmeg: Adds a warm, nutty flavor.
- Cardamom: For a slightly floral, citrusy note.
- Ginger: Perfect for a spicy kick.
Mix and match to create your own signature blend. A pinch of each can transform your apple puff pastry into a flavor explosion. 🌟
Incorporating Nuts or Caramel for Extra Decadence
Want to take your dessert to the next level? Try these additions:
- Chopped Walnuts or Pecans: Sprinkle them over the apples before folding the pastry. They add a delightful crunch.
- Caramel Drizzle: After baking, drizzle warm caramel sauce over the pastries. It’s like having an apple pie and a caramel apple in one bite. 🍯
Mini Apple Puff Pastries: Perfect for Parties
Hosting a gathering? Make mini versions of this recipe! Use smaller squares of puff pastry and fewer apple slices. They’re bite-sized, easy to serve, and absolutely adorable. Plus, they’re perfect for sharing (or not—we won’t judge). 🎉
Serving Suggestions for Apple Puff Pastry
Now that your pastries are baked to perfection, let’s talk about how to serve them. Presentation matters, after all! 🎀
Pairing with Ice Cream, Whipped Cream, or Sauces
Why settle for plain when you can go all out? Here are some delicious pairings:
- Vanilla Ice Cream: The classic à la mode combo. The cold ice cream melts into the warm pastry, creating a heavenly contrast.
- Whipped Cream: Light and fluffy, it adds a touch of elegance.
- Caramel or Chocolate Sauce: Drizzle it over the top for a decadent finish.
How to Present Your Apple Puff Pastry for Maximum Appeal
First impressions count, even with food. Here’s how to make your pastries look as good as they taste:
- Dust with Powdered Sugar: A light sprinkle adds a touch of sweetness and makes the pastries look bakery-worthy.
- Garnish with Fresh Mint: A sprig of mint adds a pop of color and freshness.
- Serve on a Platter: Arrange the pastries on a beautiful platter with a side of sauce or ice cream. Voilà—instant centerpiece! 🍽️
Storing and Reheating Apple Puff Pastry
Got leftovers? No problem! Here’s how to store and reheat your apple puff pastries without losing their magic.
Can You Freeze Apple Puff Pastry?
Yes, you can! Freeze the unbaked pastries on a baking sheet, then transfer them to an airtight container or freezer bag. When you’re ready to bake, just pop them in the oven (no need to thaw). They’ll taste just as fresh! ❄️
How to Reheat Without Losing Flakiness
To reheat baked pastries, place them in a 350°F (175°C) oven for 5-10 minutes. Avoid the microwave—it’ll make the pastry soggy. Trust me, it’s worth the extra effort to keep that flaky texture intact. 🥐
That’s it for Part 2! In the final section, we’ll cover frequently asked questions and wrap things up with some final tips. Stay tuned for the grand finale! 🍎✨
Block Quote:
“Cooking is like love. It should be entered into with abandon or not at all.” – Harriet Van Horne
Frequently Asked Questions About Apple Puff Pastry
Let’s tackle some of the most common questions people have about making apple puff pastry. Whether you’re a beginner or a seasoned baker, these answers will help you perfect your craft. 🍎🥐
Can I Use Store-Bought Puff Pastry?
Absolutely! Store-bought puff pastry is a lifesaver, especially if you’re short on time. Look for all-butter puff pastry for the best flavor and texture. It’s just as good as homemade and saves you hours of work. 🕒
What’s the Best Apple Variety for Baking?
As mentioned earlier, firm and slightly tart apples like Granny Smith, Honeycrisp, or Braeburn work best. They hold their shape during baking and balance the sweetness of the pastry. But don’t be afraid to experiment with other varieties—baking is all about creativity! 🎨
How Long Does It Take to Make Apple Puff Pastry?
From start to finish, you’re looking at about 45 minutes to an hour. This includes prep time, assembly, and baking. It’s a relatively quick dessert, especially considering how impressive it looks and tastes. Perfect for last-minute guests or sudden dessert cravings! 🕒🍴
Conclusion: Mastering the Art of Apple Puff Pastry
Congratulations! You’ve made it to the end of this ultimate guide to apple puff pastry. By now, you should feel confident in your ability to create this delicious dessert, troubleshoot common issues, and even experiment with your own creative twists. 🎉
Why This Recipe is Worth the Effort
Sure, you could buy a pre-made dessert from the store, but where’s the fun in that? Making apple puff pastry from scratch is a rewarding experience. The smell of baking apples and buttery pastry filling your kitchen is worth every minute of effort. Plus, the look on your loved ones’ faces when they take that first bite? Priceless. 💖
Final Tips for Perfect Apple Puff Pastry Every Time
Before we wrap up, here are a few final tips to ensure your apple puff pastry turns out perfectly every time:
- Keep Everything Cold: Puff pastry loves the cold. Chill your dough, your apples, and even your baking sheet if you have time.
- Don’t Rush the Baking Process: Let the pastry bake until it’s golden brown and puffed up. Patience is key!
- Experiment and Have Fun: Baking is as much about creativity as it is about following recipes. Don’t be afraid to try new flavors or techniques.
Block Quote:
“The only real stumbling block is fear of failure. In cooking, you’ve got to have a what-the-hell attitude.” – Julia Child
And there you have it—the ultimate guide to making the perfect apple puff pastry. Whether you’re baking for a special occasion or just treating yourself, this recipe is sure to impress. So, what are you waiting for? Get baking, and enjoy every flaky, apple-filled bite! 🍎✨
For more dessert inspiration, check out our Strawberry Crunch Cake for a fruity twist
1 thought on “Apple Puff Pastry Recipe: Easy, Flaky, and Irresistible!”